Spring Cleaning Outdoor Gear: Step‑by‑Step Checklist for Hikers

Hook:
Ever fumbled with a muddy boot or a leaking stove on your first spring day out and thought, "I should've cleaned this last night"? You’re not alone—most hikers skip gear maintenance until something goes wrong.
Context:
Spring is the perfect window to audit every piece of equipment before the trail crowds hit. A clean, inspected setup means fewer surprises, longer gear life, and safer hikes.
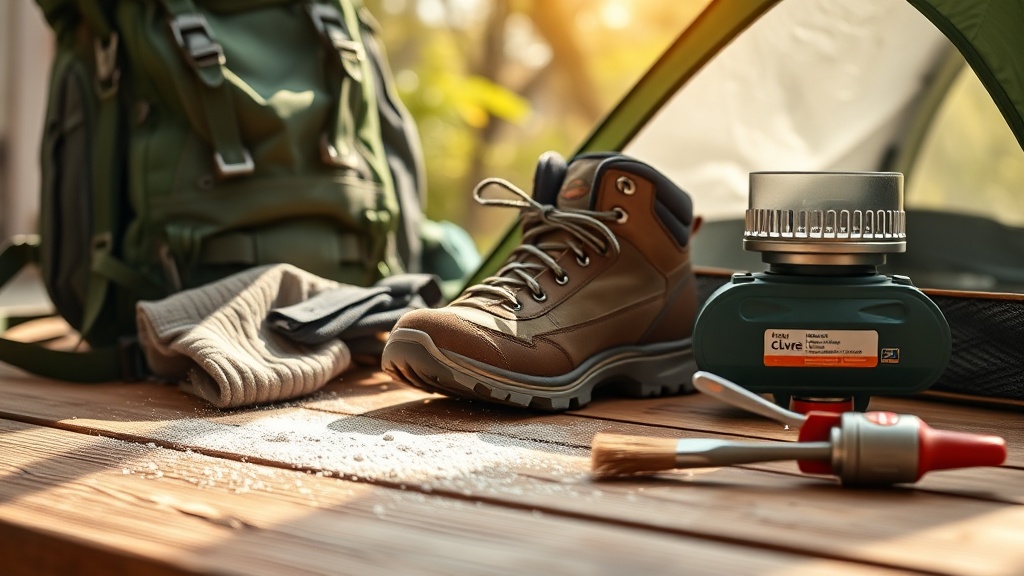
What Should I Clean First? – A Quick Gear Audit
Before you dive into deep cleaning, run a rapid visual check on these four core items. If anything looks worn, cracked, or dirty, flag it for a detailed clean.
- Backpack: Look for tears, broken zippers, and water‑resistant coating wear.
- Boots: Inspect soles, stitching, and laces for cracks or fraying.
- Tent: Check poles, seams, and flysheet for punctures or mildew.
- Cooking System: Examine stove burners, fuel lines, and cookware for residue.
Related reading: Essential Gear for Day Hikes: Bring This, Skip That – a quick rundown of must‑have items you’ll be cleaning.
How Do I Deep‑Clean My Backpack?
1. Empty and Shake Out All Contents
Remove every pocket item, then give the bag a good shake to dislodge loose debris.
2. Spot‑Treat Stains
Mix a mild soap with warm water. Apply with a soft brush, focusing on fabric panels and the interior liner.
3. Wash the Whole Bag
If the manufacturer allows, submerge the bag in a bathtub or large tub of lukewarm soapy water. Gently agitate, then rinse thoroughly.
4. Dry Properly
Hang the bag upside down in a well‑ventilated area—avoid direct sunlight which can degrade the coating.
"A properly dried backpack retains its water‑repellent treatment longer," says the REI Co‑op care guide.
How Should I Revive My Hiking Boots?
1. Clean the Outsole
Scrub the sole with a stiff brush and a mixture of water and vinegar to dissolve salt and grit.
2. Condition the Upper
Apply a leather conditioner (for leather boots) or a synthetic fabric spray. Let it soak for 15 minutes.
3. Re‑Lace and Store
Replace old laces if frayed. Store boots with newspaper stuffed inside to maintain shape and absorb moisture.
Related reading: The Reality Check: Your Spring Boot Choice Will Determine Your Season – tips on picking the right boot for spring conditions.
How Do I Repair and Clean My Tent?
1. Inspect Seams and Poles
Run a fingertip along seams; look for cracks or loose stitching. Check pole ends for splinters.
2. Wash the Fabric
Use a gentle detergent and a soft sponge. Avoid harsh chemicals that break down the waterproof coating.
3. Re‑Apply a DWR (Durable Water Repellent) Treatment
After the tent dries, spray a DWR product evenly. This restores water‑shedding capability.
4. Store in a Cool, Dry Place
Fold loosely—avoid compression which can damage the coating over time.
How Can I Clean My Cooking System?
1. Disassemble All Parts
Take apart the stove, fuel canister, and cookware. Remove any food residue.
2. Soak in Warm Soapy Water
Let components sit for 10‑15 minutes, then scrub with a non‑abrasive pad.
3. Rinse and Dry Thoroughly
Water left in fuel lines can cause flare‑ups. Air‑dry all parts before re‑assembly.
4. Perform a Test Burn
Run a short flame outdoors to ensure proper fuel flow and no leaks.
What Are the Final Checklist Items Before Hitting the Trail?
- Pack a Gear‑Care Kit: Include a small brush, spare laces, a DWR spray, and a multi‑tool.
- Do a Weight Check: Cleaned gear may weigh slightly more; adjust your pack load accordingly.
- Run a Short Test Hike: Carry the cleaned gear for a half‑day trek to confirm everything functions.
- Log the Maintenance: Note the date and any parts replaced in a trail journal (or a simple spreadsheet).
Takeaway
A disciplined spring cleaning routine saves you from on‑trail emergencies, extends the life of expensive gear, and gives you confidence that every piece works as intended. Grab a bucket, set a timer, and follow the checklist above—your future self will thank you on the first sunny day of the season.
Related Reading
- Winter Hike Safety in the Cascades: 7‑Item Checklist – for post‑season gear prep.
- Planning a Safe Multi‑Day Spring Hike in the Cascades – next steps after your gear is ready.
- The Reality Check: Your Spring Water Plan Is Probably Wrong—and Dehydration Doesn't Care About Your Filter – water‑related gear considerations.